Tutorial cdiff
To learn more about cdisp see the commands page.
Step 1 : Tutorial Setup
Create a folder on c:\ drive called "c:\smcl". Download the following image
"height.jpg" and place it in the folder.
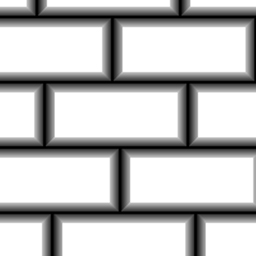
(Original texture by Chrkl.)
Next open a text editor and save the blank file as "tutorial_cdisp.bat" in the smcl folder. It is important that the file have the .bat extension so Windows® recognizes it as a batch script.
Step 2 : Write the Batch Script
We are going to use a Windows® batch script to send command lines to ShaderMap CL. To learn more about Windows®
batch scripts see
Batch Files (Scripts) in Windows.
Open the file "c:\smcl\tutorial_cdiff.bat" in the text editor. Copy & paste the following three lines:
CD "C:\Program Files\ShaderMap CL"
START /WAIT shadermap.exe cdisp "c:\smcl\height.jpg" -norm (100,150,0,0) -ambo (100,12,15,50,60,0,0) -spec (100,-25,40,0) -v
Now save the file.
START /WAIT shadermap.exe cdisp "c:\smcl\height.jpg" -norm (100,150,0,0) -ambo (100,12,15,50,60,0,0) -spec (100,-25,40,0) -v
Step 3 : Understanding the Script
The first line of the script uses the Windows® command CD. CD sets the working directory of the script.
The second line uses the Windows® command START. START runs Shadermap CL with the cdisp command. Next we have the command arguments. Each argument is discussed below.
-norm (100,150,0,0)
-norm creates a non-tileable normal map with 150 for intensity.
-ambo (100,12,15,50,60,0,0)
-ambo creates a non-tileable ambient occlusion map with 12 samples, a height-bias of 15%, and a sizable dose of
post-blur at 60.
-spec (100,-25,40,0)
-spec creates a specular map that is also not tileable. It has low brightness at -25 with medium contrast at 40.
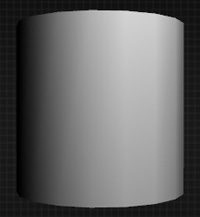
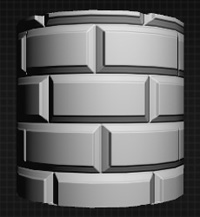
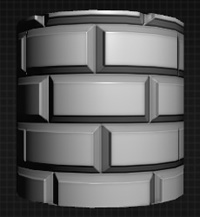
Step 4 : Run the Script
Next open the smcl folder and double click on the batch file "tutorial_cdisp.bat". Below is a sample rendering
using the created maps.
(No Maps) / (Norm + Disp) / (Norm + Disp + Ambo + Spec)
Step 5 : View Your Files
The created maps are in the same directory as the source displacement image. You should now see the following
new files in the smcl folder: height_NORM.tga, height_AMBO.bmp, and height_SPEC.bmp.