Map Input Filters
As of version 4.2, ShaderMap allows most maps to apply an Input Filter to each map input. When the map plugin has this feature enable, the
input filter button (1) will be displayed above the map node's properties. See below:

This button displays the Red, Yellow, Green, Cyan, Blue, Magenta weights applied by the input filter. Clicking on the button will bring up the
Map Input Filter dialog.
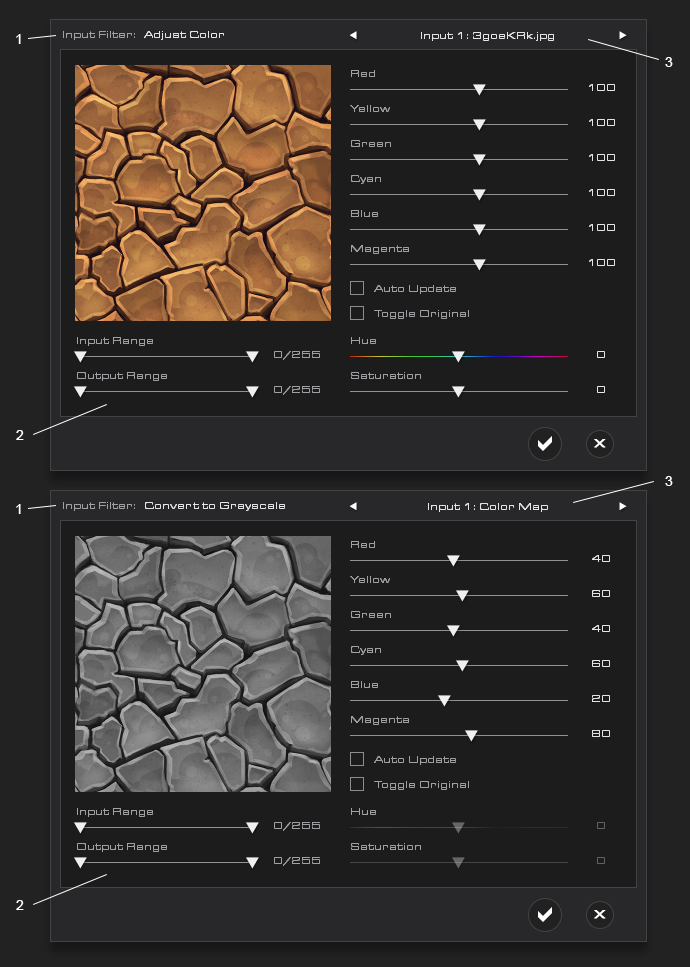
The Input Filter dialog will be in one of two states:
Adjust Color or
Convert to Grayscale (1). If the selected map
requires a color image for the input then the dialog is used to adjust the color, hue, and saturation of the input map.
If the selected map requires a black and white (grayscale) image for the input then the dialog allows the user to adjust the color weights used when converting to grayscale.
Both states of the Input Filter allow the
input and output ranges (2) of the input map to be set. This is useful when wanting to use only light or dark
pixels from the input. If the map has multiple inputs then you can select which input to adjust using the
Input droplist (3) located in the upper right of the
dialog. See below:

If Auto Update is enabled then each change to the Input Filter will result in the map being rendered immediately. Otherwise the map is only rendered after the dialog
has exited. To view the original input image, enable Toggle Original.