In this quick start tutorial, you will learn how to bake ambient occlusion from a Source Model, and also how to bake Tangent Space Normal Maps from a
Source Model and a Cage Model using Projection Baking. The 3D Model Setup interface is demonstrated for setting up a Cage Mesh as well as defining
Material IDs.
Baking Ambient Occlusion from a Source Model
Step A -
Download the Free Windmill Model.
A free TurboSquid account is required for download. We will be using this free model from TurboSquid during this example. Once you have the
file downloaded, place the "windmill.obj" file somewhere temporary such as the Desktop.
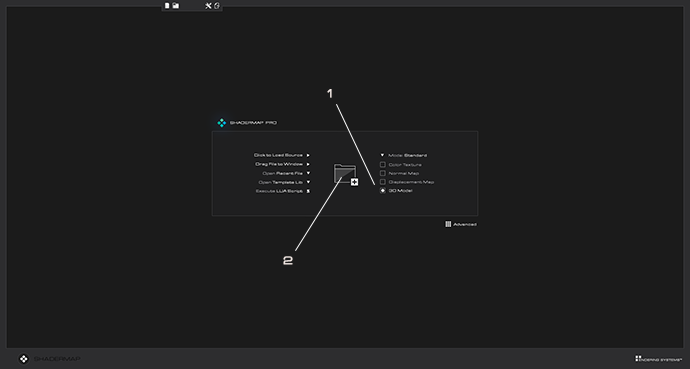
Step B - Open ShaderMap, on the Start Page make sure that STANDARD MODE is selected and 3D MODEL (1) is checked. Click the Folder button (2) to load the Windmill OBJ file "windmill.obj".
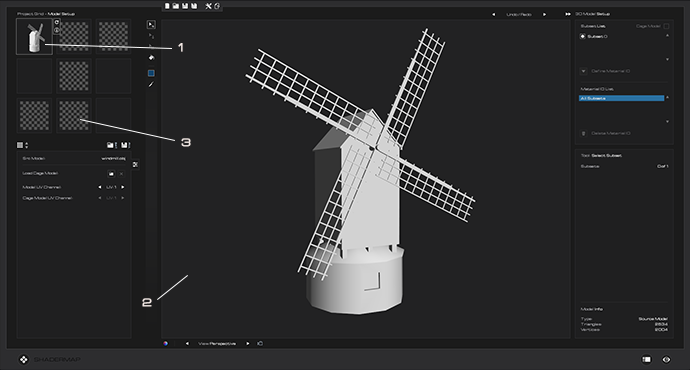
You now see the 3D Model imported into the Project Grid (1) and a number of default maps added to the project that use the 3D Model as their input. The
Source Model Windmill is selected and the 3D Model Setup (2) is displayed on the right of the Main Interface. Click the Ambient Occlusion Map (3) in the Project Grid.
 Step C
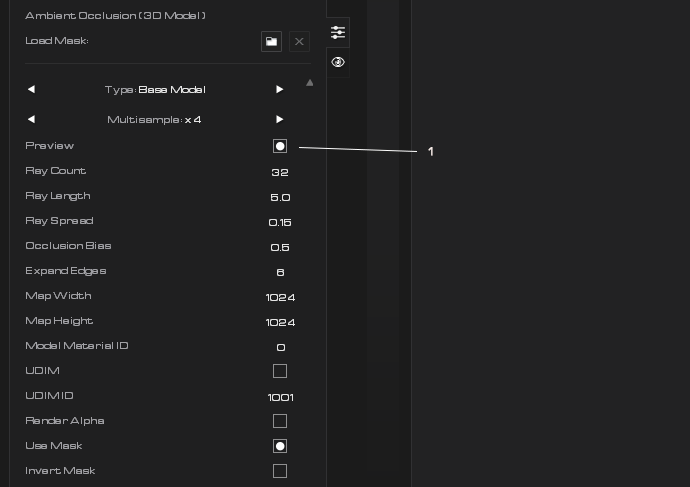
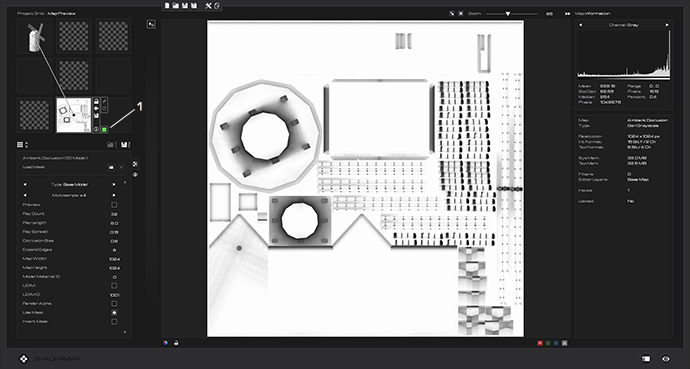
 - Adjust the Ambient Occlusion map settings to match the following. Make sure the Render Type selected is Source Map and not Cage Projection.
You can disable the Preview check box (1) to render the high quality version of the map.
 Step D
 - Start the Map Rendering by pressing the Green Render Button (1) located next to the Ambient Occlusion thumbnail in the Project Grid. Once the rendering is
completed it will display in the Map Preview window.
 Step E
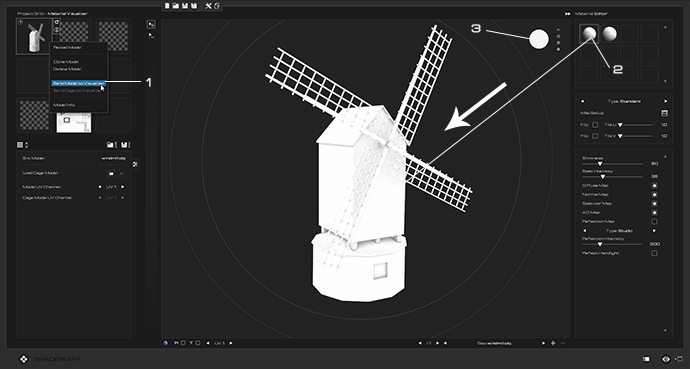
 - Right click the Model Thumbnail in the Project Grid and select "Send Model to Visualizer" (1). This will send the model geometry to the Material Visualizer.
Drag the first material onto it (2).
In the Material Visualizer select and delete all lights in the scene, then turn the Ambient lighting in the scene all the way up to better visualize the occlusion shading (3).
Below you can see the final result (Preview Unchecked and increased size of the AO Map) applied to the Windmill model in the Material Visualizer.
Baking Color ID Maps
Step A - Color ID Maps are used in various 3D Painting applications. ShaderMap allows you to quickly color 3D Models and render ID Maps using the Model Setup.
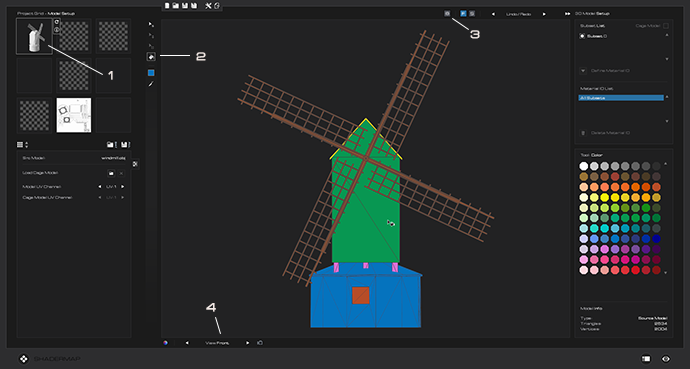
Return to Model Setup by Double Clicking the Model Node in the Project Grid (1). Next select the Color Tool from the Toolbar (2). Use the color palette on the right of the Model Setup
to color parts of the Windmill model. Using rect select with Ignore Backfaces (3) turned off, you can paint selections of triangles. Switching Views (4) in the Model Setup can also assist you
while using the Color Tool. When completed you should have something that looks like this.
 Step B
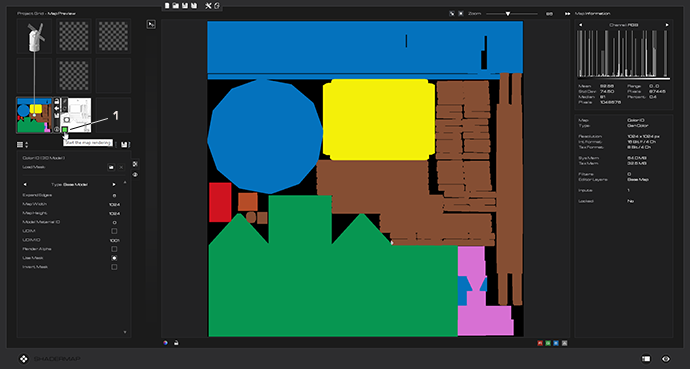
 - Select the Color ID Map and click the Green Button (1) to start the map rendering. When finished you should see something similar below. Edges are automatically
expanded (set in Map Properties) to ensure colors overlap the edges of the Triangles.
 Step C
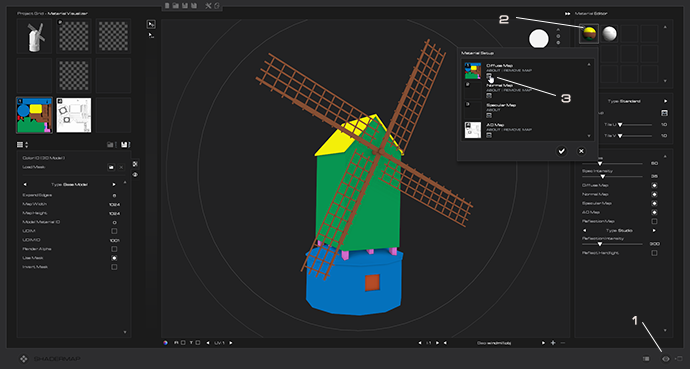
 - Go back to the Material Visualizer by pressing "M" on the keyboard or by clicking the Visualizer button (1). Double click the standard material (2) which is already
applied to the windmill from the previous section. This will bring up the Material Setup Dialog. Assign the Color ID Map to the Diffuse channel of the material (3). You can now see the
Color ID Map on the model.
Baking Normal Maps using Cage Projection
Step A - In this section we will be baking High Polygon normals (from the Source Model) onto a low polygon Cage Model. Unzip this
3D Tire Model Zip File and save the files "tire_high.FBX" and "tire_low.FBX" to a temp location
such as your Desktop. Thanks to PABLO PEREZ for creating the High Polygon Tire.
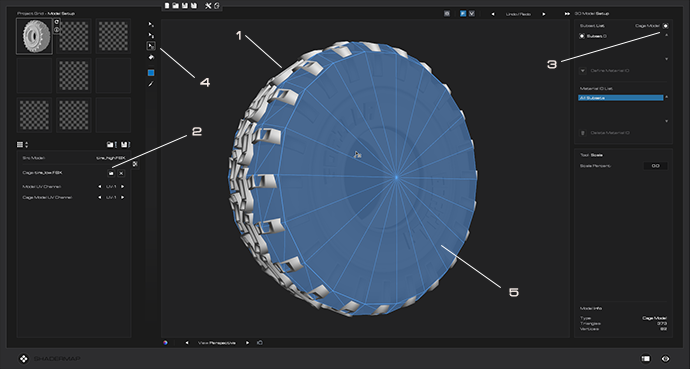
Step B - Load the file "tire_high.FBX" into ShaderMap from the ShaderMap Start Page. You will see the Tire in the 3D Model Setup (1).
In the Node Properties, click the Load Cage button (2) to load the file "tire_low.FBX" as the Cage Model. Make sure that Cage Model is checked in the
upper right of the Model Setup (3).Select the Push Tool (4) from the Toolbar and draw a rect over the
Cage Model. You will now see the Cage Model overlapping the Source Model in the 3D Model Setup (5).
 Step C
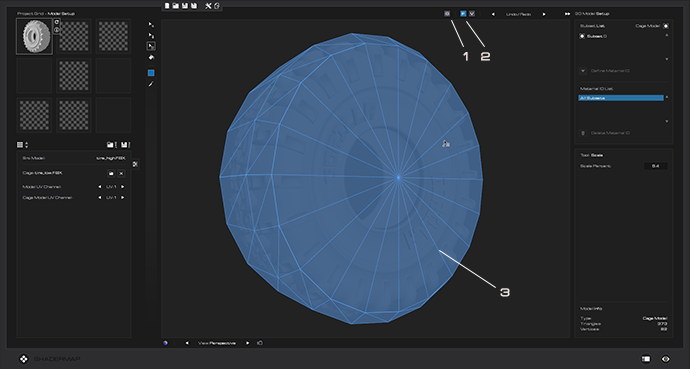
 - Ensure Push Tool is selected in the Model Setup and that Ignore Backface Triangles (1) is disabled and Select Faces is enabled (2). Select all of the
Cage polygons the click and drag them to completely cover the Source Model (3).
 Step D
 - Select the Tangent Space Normal Map in the Project Grid (1). Have a look at the Node Properties but you don't need to change anything.
Press the Green Render button (2) next to the Map Thumbnail and the Normal Map will render. The final map will be displayed in the Map Preview (3).
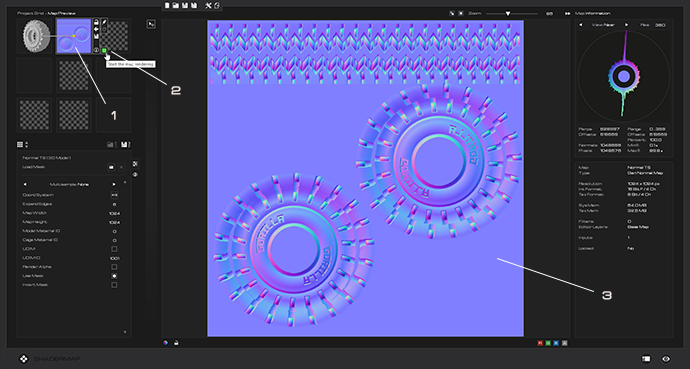
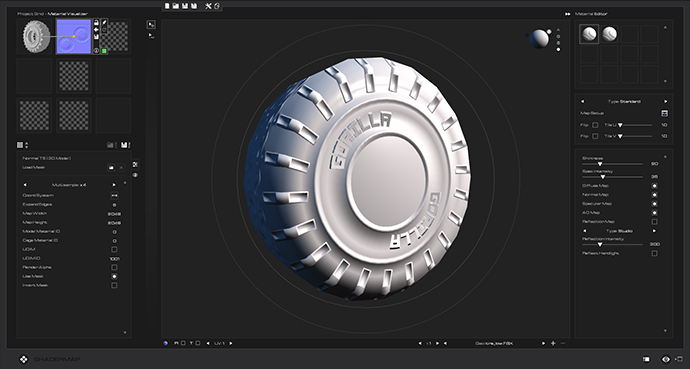
Below is the baked Normal Map with a Cage Projection baked Ambient Occlusion applied to the low polygon tire in the Material Visualizer.
Additional Settings
First it should be noted that all 3D Models used to bake maps should have valid texture coordinates that are not tiled outside of the 0.0 - 1.0 range (unless UDIM is used).
Second, if a model has multiple maps attached to different subsets on the model then the Subset Selection Tool (or the Subset List) should be used
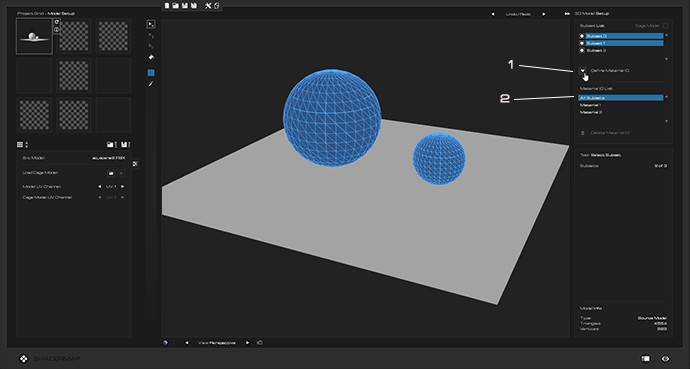
to first select those subsets then define a Material ID (1) from those subsets. Once a Material ID is defined it can be set to any Map that uses a
3D Model as input in the Map Properties. What this means is that the Map will only operate on the Subsets in the Material ID and will therefore output a valid texture relating
to those subsets.
The default Material ID is Zero (2) and contains all subsets in the model. Care must be taken to build Material IDs for both Cage and Source Models
in some instances of Cage Projection baking.
