Below is a quick start guide that will give you a basic understanding of how to use the ShaderMap Normal Editor.
Following this tutorial will help you understand specific items discussed later in this manual.
Step A - Open ShaderMap by double clicking the ShaderMap icon. Enter the Advanced Map setup by clicking the
Advanced button (1) located to the bottom-right of the center box. This will create an empty project.
 Step B
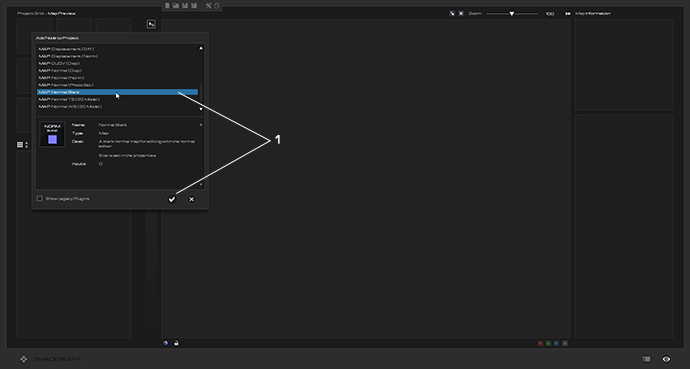
 - Add a single 'Map: Normal Blank' type map to the project and accept the changes (1).
 Step C
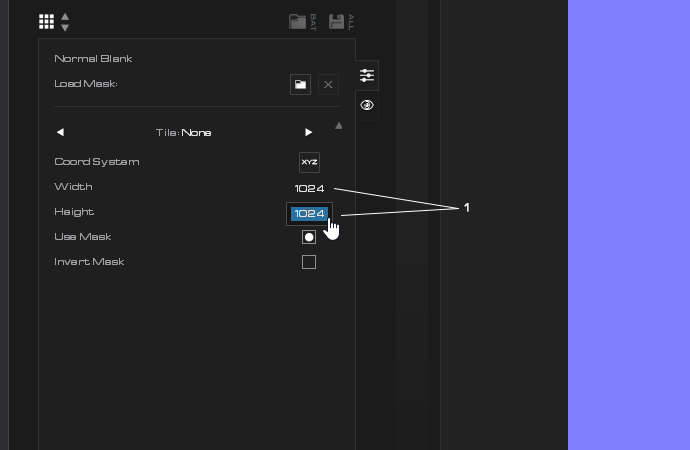
 - Set the map size to 1024 x 1024 pixels (1).
 Step D
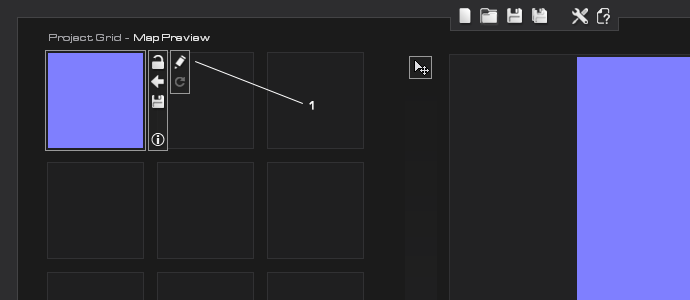
 - Send the Normal Map to the Normal Editor by clicking the Edit Icon (1) located next to the Map Thumbnail in the Project Grid.
We now have a Normal Map in the Editor that we can work with. Take a minute and look at all the parts of the Normal Editor as listed in the image below.
- Normal Editor tools
- Tool specific controls
- Editor Canvas
- Overlay controls
- History listbox
- Layer controls
- Add layer controls (Normal, Displacement, Image)
- Return to Main Interface
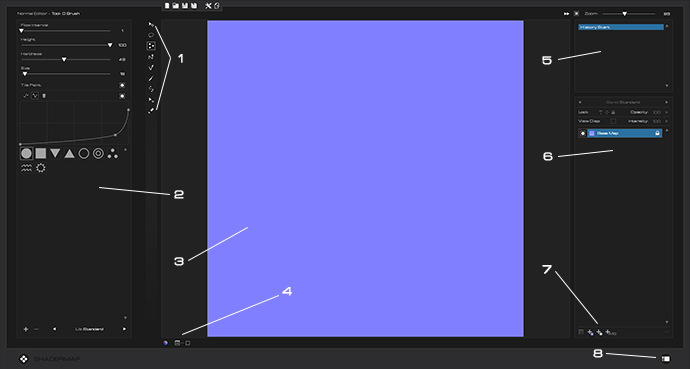
You can see that there is currently only one layer in the layer control and that is the 'Base Map' which is the map imported into the Normal Editor. It has a purple icon next to it
indicating that it is a Rasterized Normal type layer. You can use the following tools to paint directly to a Rasterized Normal Map: Normal Brush, Vector Brush, and Eraser.
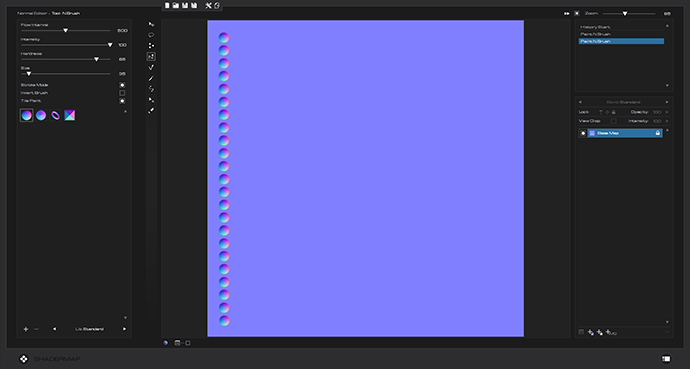
Step E - Select the Normal Brush and paint to the Base Map layer. You can draw lines by clicking a point then holding the Shift Key and clicking another point.
It should look something like this.
 Step F
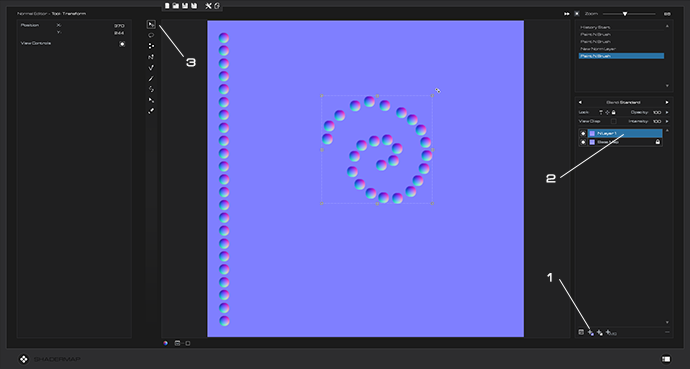
 - Create a new Rasterized Normal Layer by clicking the Plus Purple button (1) under the layer control. Make sure the layer is selected in the layer control (2) and
Normal Brush paint to the new layer. Select the Transform Tool (3) when finished.
 Step G
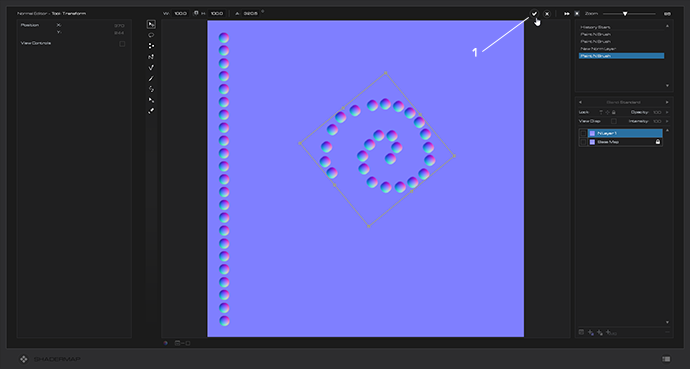
 - With the Transform Tool selected click the recently drawn layer to select it, this will show the Transform Gizmo around the layer.
Next move your mouse to one of the corners of the Transform Gizmo and left click it. This will start the transformation of the layer. Try scaling and rotating the layer
using the gizmo. When finished accept changes by clicking the Check button (1) located above the canvas.
 Step H
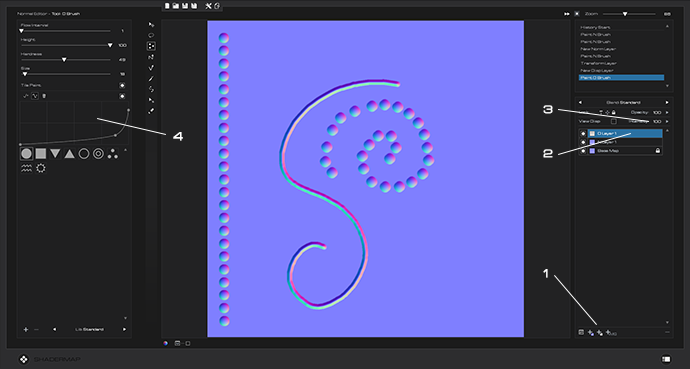
 - Create a new Displacement Layer by clicking the Plus Grayscale button (1) under the layer control. Make sure the layer is selected in the layer control (2) and
Displacement Brush paint to the new layer. Once finished adjust the layer's intensity (3) in the layer control. You can adjust the shape of the displacement brush
by modifying the curve in the Brush Properties panel (4).
 Step I
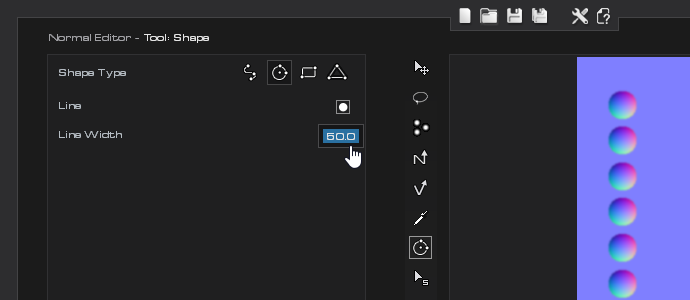
 - Select the Shape Tool and set the shape parameters to draw a Line Oval as shown below.
 Step J
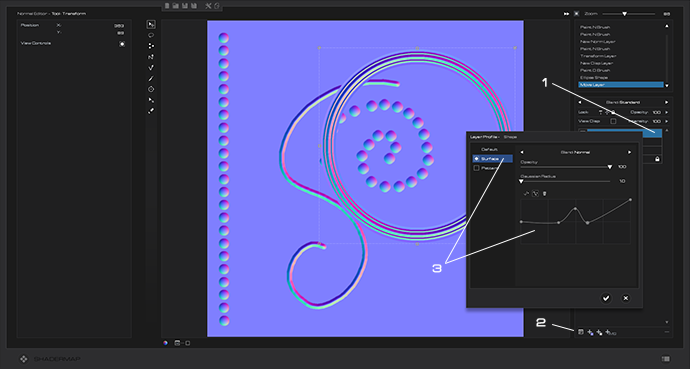
 - Click drag and draw an Oval onto the Canvas. Hold the Shift key if you want to ensure a circle. It may appear invisible once you've drawn it because it does not
yet have a Displacement Surface applied to it. Select the layer in the layer control (1) and open up the layer profile (2). Apply a surface using the surface curve (3) to the oval as shown below.
 Step K
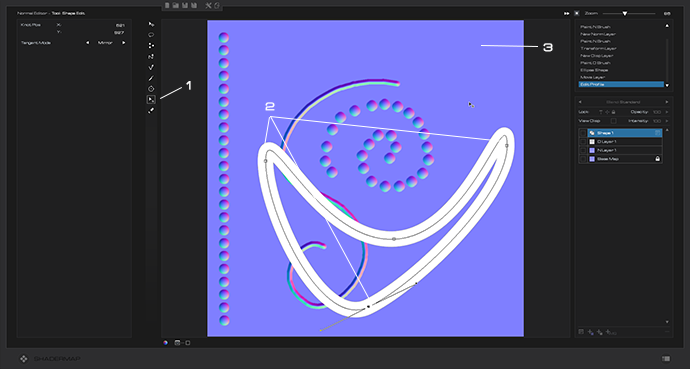
 - Select the Shape Edit Tool (1) and use it to select the Oval Shape. This will display the control points for the shape. Use the tool to modify the shape (2) then click off of the
shape layer onto the canvas to apply the changes (3).
This should give you a great starting point for working with the Normal Editor. Try playing around with the various blend modes and opacity. You can also try applying a Displacement
Pattern to any Displacement or Shape layer using the Layer's Profile. To learn more details about each tool press and hold F1 then click on any tool.